mickappy Posted November 2, 2011 Author Share Posted November 2, 2011 hi robbie, hows things with u mate? u got that cobra done yet? yes i remember that night well too:) bargain price but add the 3 years of storage to it and well its cost me a feckin small fortune oh well 400 turbo when finished hope ur keeping well mate. Quote Link to comment Share on other sites More sharing options...
Devil Fish Posted November 2, 2011 Share Posted November 2, 2011 those pictures of fitting the kit bring back some memories! I hope Stradacab doesn't see them though otherwise its back to therapy for him. good work dude Quote Link to comment Share on other sites More sharing options...
Robbie Posted November 2, 2011 Share Posted November 2, 2011 Bummer on the storage Mick, yes it was a cracking price at the time . Cobra wise I just tiddle now and then, that project was meant to be done at a sedate pace though I have been at it a right bit this past month. Starting to get the bug for getting it finished and letting the cubes loose on the road lol Quote Link to comment Share on other sites More sharing options...
mickappy Posted November 2, 2011 Author Share Posted November 2, 2011 that will be some weapon mate. have you got a thread on the build? id love to see it.? Quote Link to comment Share on other sites More sharing options...
mickappy Posted November 8, 2011 Author Share Posted November 8, 2011 (edited) after the practice on the o/s the n/s rear arch was a doddle. thats the welding complete Edited June 3, 2014 by mickappy Quote Link to comment Share on other sites More sharing options...
mickappy Posted November 14, 2011 Author Share Posted November 14, 2011 (edited) with the rear arches done its time for some dummy fitting. power steering from a corsa b and peddle box, boxs fits pretty well, ive opted to use the standard accelerater peddle. nothing really to do here,it will al be fitted propperly after paint. new bearing. Edited June 3, 2014 by mickappy Quote Link to comment Share on other sites More sharing options...
Robbie Posted November 14, 2011 Share Posted November 14, 2011 (edited) that will be some weapon mate. have you got a thread on the build? id love to see it.? Build Blog done a wee bit of a blog Mick as I go along. Edited November 14, 2011 by Robbie Quote Link to comment Share on other sites More sharing options...
Kevin Abbott Posted November 15, 2011 Share Posted November 15, 2011 (edited) Mick, is that an escort pedal box? Edit, will that bearing fit on the inside? Ta Kev Edited November 15, 2011 by Kevin Abbott Quote Link to comment Share on other sites More sharing options...
mickappy Posted November 15, 2011 Author Share Posted November 15, 2011 its a mk2 pedal box, i bought the wrong 1. i had to cut about 2" off the back of it. its perfect tho, and im hoping the bearing will go on inside. Quote Link to comment Share on other sites More sharing options...
mickappy Posted November 16, 2011 Author Share Posted November 16, 2011 (edited) now the u clips and bolts have turned up i can carry on fitting the 400 kit. there a resess for each clip in the mould of the back mount. i fitted all the clips then offered it up to the rear arch. tighted all the bolts to see how it fits it fits quite flush to the body but there is a small gap which needs filling b4 it looks 100% arch came back off, and i put cling film all over back arch where am going to fibre glass the arch back on. with the arch back on, i put bolts back in but only on the first thread ready to tighten quick leaving about a 10mm gap all away round the arch. then i mixed loads of fibreglass filler and filled the 10mm gap. when the gap was filled i tightened the bolts fully. the fiberglass spreads out filling the gap. now hopefully tomorrow when its set i should be able to take the arch off and trim and sand and WILL have a perfect fit. front wing just basically bolted on without too much trouble. this is the inside where the wing sits on the a pillar. cant wait to finish that back arch off tomoz Edited June 3, 2014 by mickappy Quote Link to comment Share on other sites More sharing options...
opelscott22 Posted November 17, 2011 Share Posted November 17, 2011 Nice job!, looks very neat. I cant wait to get to this stage! Where did you get your bolts and clips from? I thought about having mine zinc coated but if you can get new ones its not worth the bother. Scott. Quote Link to comment Share on other sites More sharing options...
mickappy Posted November 17, 2011 Author Share Posted November 17, 2011 scott i will pm u a link , i got em off ebay:-) cheap too. Quote Link to comment Share on other sites More sharing options...
StevieH Posted November 17, 2011 Share Posted November 17, 2011 Brilliant idea for filling the rear arch gap , im fitting a HSR kit soon so will use your cling film trick . can't wait to see how it turns out Quote Link to comment Share on other sites More sharing options...
mickappy Posted November 17, 2011 Author Share Posted November 17, 2011 its a good idea to get a nice neat finish, i saw it on the manta400 site years ago and i also used this idea with my 240 kit. Quote Link to comment Share on other sites More sharing options...
Dave750rs Posted November 17, 2011 Share Posted November 17, 2011 What a crackin job your making of the car and the thread following your progress will follow this thread as currently preparing a cavalier for rallying and already got ideas probably above my ability keep up the good work and the photo's coming Dave Quote Link to comment Share on other sites More sharing options...
Kevin Abbott Posted November 17, 2011 Share Posted November 17, 2011 its a mk2 pedal box, i bought the wrong 1. i had to cut about 2" off the back of it. its perfect tho, and im hoping the bearing will go on inside. Cheers Mick Thought it was, but how do I know what the correct one is before I go mad on ebay? Ta Coming on well mate Quote Link to comment Share on other sites More sharing options...
mickappy Posted November 17, 2011 Author Share Posted November 17, 2011 kev u need a mk1 box http://www.ebay.co.uk/itm/Ford-Escort-Mk1-Brake-Balance-Bar-Bias-Pedal-Box-Hydraulic-Clutch-Wilwood-M-C-/120793253741?pt=UK_CarsParts_Vehicles_CarParts_SM&hash=item1c1fd6c76d i got sent a mk2 which i had to modifie. mk1 goes stright in mate.. Quote Link to comment Share on other sites More sharing options...
Kevin Abbott Posted November 17, 2011 Share Posted November 17, 2011 kev u need a mk1 box http://www.ebay.co.uk/itm/Ford-Escort-Mk1-Brake-Balance-Bar-Bias-Pedal-Box-Hydraulic-Clutch-Wilwood-M-C-/120793253741?pt=UK_CarsParts_Vehicles_CarParts_SM&hash=item1c1fd6c76d i got sent a mk2 which i had to modifie. mk1 goes stright in mate.. Fantastic That's my Christmas present sorted Quote Link to comment Share on other sites More sharing options...
mickappy Posted November 17, 2011 Author Share Posted November 17, 2011 (edited) took the arch back off tonight, removed the cling film. i care fully removed the excess fibre glass around the edge and sanded with a da sander, still needs work but you can see already the fit is good. a few hours fettling and it should be done. Edited June 3, 2014 by mickappy Quote Link to comment Share on other sites More sharing options...
StevieH Posted November 18, 2011 Share Posted November 18, 2011 That's just superb the finish is very good indeed so glad you've shown how to do this i would never have thought of doing that . can't wait to do mine now Quote Link to comment Share on other sites More sharing options...
mickappy Posted November 21, 2011 Author Share Posted November 21, 2011 (edited) the drivers side is completed, looks really well, very pleased:) best start on the tuther side now.. just took delivery of my new seats too.. look even better in the flesh:-) Edited June 3, 2014 by mickappy 1 Quote Link to comment Share on other sites More sharing options...
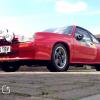
mickappy Posted December 13, 2011 Author Share Posted December 13, 2011 (edited) its getting harder to get in the garage now the cold weathers arrived.. need a gas refill for sure:) anyways a quick up date. 400 just about fitted. 400 bonnet needs some fettling as it seems to of got out of shape. probably because its been in storeage for years wit things lent against it. roll cage fitted so basically im ready to strip again and start etch primer and stone chipping the underside and inside. im hoping to start the paint by the end of jan to keep this project on time for billing. Edited June 3, 2014 by mickappy 1 Quote Link to comment Share on other sites More sharing options...
mickappy Posted December 14, 2011 Author Share Posted December 14, 2011 (edited) had a few hours on this last night. roll cage fully fitted then took out for powder coating. newseat rails to do next. also managed to pick up my new axel, new built zf lsd with disc con and steel torque tube:) should keep power on road well.. cheers kev. im in need of some capri front indicaters for my front 400 bumper.. anyone got any spare there wanting to sell? Edited June 3, 2014 by mickappy Quote Link to comment Share on other sites More sharing options...
mickappy Posted January 3, 2012 Author Share Posted January 3, 2012 (edited) happy new year everyone. been nice n busy over the festive period:) front axle cross member stripped down and de-bushed... forgot what a pain getting the old bushes out was..i recommend a heat gun:) thats off to be strethened shotblasted and powder coated ready for the new bushes a ball joint and springs.. b4 pic got my new bumper from rallytec and it fits well. also decided on the steel bonnet and square headlights( but this may change yet) i just like the idea of a steel bonnet. intercooler for turbo has been measured up and ordered, it should or will sit neatly behind the bumper out of sight. engine a mv6 box dummy fitted . cant see any problems with the box hitting the tunnel so this just looks like a stright fit:) kev abbott n/s mount for c20let works a treat too.. im hoping now this project will move on fairly fast now as all fab and dirty work is done. i will pop some pics of box n engine later Edited June 3, 2014 by mickappy Quote Link to comment Share on other sites More sharing options...
opelscott22 Posted January 3, 2012 Share Posted January 3, 2012 Looks good! Your getting on much better than me, Im still at the grotty welding stage...Im doing the steel bonnet and big lights on mine too, the fiber ones just never seem to fit properly! Which bushes are you using? The ones I have (cant remember the name) have a crap front subframe rear bush with no outer sleeve, might swap them out for original ones. What interior are you going for? Scott Quote Link to comment Share on other sites More sharing options...

Recommended Posts
Join the conversation
You can post now and register later. If you have an account, sign in now to post with your account.