BigJohn Posted March 13, 2016 Share Posted March 13, 2016 It always seems the job is on the back leg when it's all in one colour of primer, even though there is still quite a bit to do. Looking good Kev. Just got back from Lanzarotte late Thursday, when's the next NW meeting, April? Cheers, John. 1 Quote Link to comment Share on other sites More sharing options...
ANDY ABBOTT Posted March 13, 2016 Share Posted March 13, 2016 not this week as we have to juggle the mantas in between the paying work for the business plus we are starting some upgrades on our commercial booth were the mancona is currently being worked on so that will also delay us Quote Link to comment Share on other sites More sharing options...
Kevin Abbott Posted April 9, 2016 Author Share Posted April 9, 2016 just a bump, FMS will be moving into the classic car restoration market soon 2 Quote Link to comment Share on other sites More sharing options...
Snowy Posted April 9, 2016 Share Posted April 9, 2016 7 hours ago, Kevin Abbott said: just a bump, FMS will be moving into the classic car restoration market soon What will your rates be? Quote Link to comment Share on other sites More sharing options...
Kevin Abbott Posted June 29, 2016 Author Share Posted June 29, 2016 On 09/04/2016 at 01:14, Kevin Abbott said: just a bump, FMS will be moving into the classic car restoration market soon Scrap that, it's too hard! FMS is offering paint though 1 Quote Link to comment Share on other sites More sharing options...
Kevin Abbott Posted June 29, 2016 Author Share Posted June 29, 2016 On 13/03/2016 at 20:42, MANTAMAN said: So, are you going to be 'Shooting colour' this week ? It's been while Ian, but.. No.. Paint still not on. Bog sand, bog sand, bog sand over and over Tom want's the body work to be better than my red coupe on this so it's all in the prep. Finally found the other spacer and then moved on to cutting out the inner arch on the last wing to clear the wheels. Me, doing my Magic bit with the magic marker just before the magic angle grinder Project images are available to Club Members Only, Click to become an OMOC Member. Measure twice, cut once Project images are available to Club Members Only, Click to become an OMOC Member. I managed to find all the parts for the headlights and after nearly 10 years the lights are in and they work again Project images are available to Club Members Only, Click to become an OMOC Member. Arch sykaflex stuck into place and the car getting straighter day by day Project images are available to Club Members Only, Click to become an OMOC Member. Fingers crossed it will be ready for Billing 6 Quote Link to comment Share on other sites More sharing options...
Kevin Abbott Posted April 14, 2017 Author Share Posted April 14, 2017 Andrew Quote Link to comment Share on other sites More sharing options...
Kevin Abbott Posted April 27, 2017 Author Share Posted April 27, 2017 (edited) Many many weeks have passed in prep, the car was straight but it needed massaging to get the lines perfect and seeing as the arches came from another car and the skirts I made from 4 standard manta skirts it came out ok I'm trying to add pics from photobucket but it's just too hard so I will add a couple and be done Why we cant host our own photos is beyond me I'm sure mantadoc will be in telling me why and photo sizes but I just cant be arsed messing any more Project images are available to Club Members Only, Click to become an OMOC Member. Project images are available to Club Members Only, Click to become an OMOC Member. there is months of work and hundreds of pics but its just far too hard to put hem here any more, it's taken hours of passwords and uploads and click this and that and stop this at that add on photobucket and I just CBA Yes me moaning again on an edit, the club is cash rich... can we please please for the love of God get a better easy to use website................please.............please..........the forum is dead.............a dead forum will not generate more members and if it is so hard to update a thread or add pics then people will continue to use faceache and we all lose Have another pic Project images are available to Club Members Only, Click to become an OMOC Member. Edited April 27, 2017 by Kevin Abbott moaning again 8 Quote Link to comment Share on other sites More sharing options...
Monaco Blue Posted April 28, 2017 Share Posted April 28, 2017 Kevin, Rather than use Photobucket, get yourself a free Flickr account. All you need do then is copy & paste the link in the address bar and voila, the photo(s) are embedded within your post. Much easier that using Photobucket. Anyway, the car is looking great! 2 Quote Link to comment Share on other sites More sharing options...
Danny D114BCW Posted April 28, 2017 Share Posted April 28, 2017 I just upload off my phone to the site as i cant do it the other way its too old fashioned. But cant you just click choose files at the bottom of your reply? And also going off them pictures it doesn't look very painted to me or do you mean the inside bits Quote Link to comment Share on other sites More sharing options...
TheRealExile Posted April 28, 2017 Share Posted April 28, 2017 If this forum can integrate with tinypic then that would work and it's free, that way we could all upload as much as we like without having to mess about cropping photos on the pc. I ran a football supporters forum and had the same issue that photos were filling the expensive server space very quickly and the tinypic fixed the issues overnight. 1 Quote Link to comment Share on other sites More sharing options...
Kevin Abbott Posted April 30, 2017 Author Share Posted April 30, 2017 Project images are available to Club Members Only, Click to become an OMOC Member. Project images are available to Club Members Only, Click to become an OMOC Member. 9 Quote Link to comment Share on other sites More sharing options...
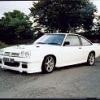
Blue Thunder Posted April 30, 2017 Share Posted April 30, 2017 That's a good paint job. Are you keeping those alloys on? Quote Link to comment Share on other sites More sharing options...
Paul Barrett Posted April 30, 2017 Share Posted April 30, 2017 Stunning 1 Quote Link to comment Share on other sites More sharing options...
Monaco Blue Posted April 30, 2017 Share Posted April 30, 2017 (edited) Lovely! It's certainly a vibrant red! Looks very similar to your Coupe. Those wheels look the business! I'd imagine you were both smiling like a pair of Cheshire Cats at the end of the day! .....am I allowed to say that?? Edited April 30, 2017 by Monaco Blue 1 Quote Link to comment Share on other sites More sharing options...
SCP Posted April 30, 2017 Share Posted April 30, 2017 Looks great makes all your time an effort worthwhile ,will it be on the road this summer 👍 1 Quote Link to comment Share on other sites More sharing options...
Kevin Abbott Posted May 1, 2017 Author Share Posted May 1, 2017 (edited) On 30/04/2017 at 07:52, Blue Thunder said: That's a good paint job. Are you keeping those alloys on? Paint is easy, it is the prep that makes the paint job Yep the wheels are staying on it, the car now needs dropping on the floor by about 3 inch Project images are available to Club Members Only, Click to become an OMOC Member. Project images are available to Club Members Only, Click to become an OMOC Member. Now starting the work on the satin trim and heads down for new billing Loft hunt for all the trim I pulled from a car Andy Rutter scrapped 10 years ago and a hunt in the loft for the green exclusive hatch glass Project images are available to Club Members Only, Click to become an OMOC Member. Project images are available to Club Members Only, Click to become an OMOC Member. Project images are available to Club Members Only, Click to become an OMOC Member. Project images are available to Club Members Only, Click to become an OMOC Member. When your little Brother need help you need to get your A game on Project images are available to Club Members Only, Click to become an OMOC Member. Edited May 1, 2017 by Kevin Abbott oh the fun 3 Quote Link to comment Share on other sites More sharing options...
Kevin Abbott Posted May 1, 2017 Author Share Posted May 1, 2017 We wanted more depth to the irmscher ascona b twin light setup as the originals left the lights stuck out too far. Project images are available to Club Members Only, Click to become an OMOC Member. So I got creative and looked around for a way to get more depth, playing with just a set of glass convinced me that's what I needed to do Project images are available to Club Members Only, Click to become an OMOC Member. That's a better depth, hmmmmm, how to achieve it.... Looking around the lab the air con tube looked the correct size so I tried a manta headlight in I had lying around. Project images are available to Club Members Only, Click to become an OMOC Member. I bought a length of tube and cut it up Project images are available to Club Members Only, Click to become an OMOC Member. Ascona b irmsher twin light bezels are easy to get so I chopped these up Project images are available to Club Members Only, Click to become an OMOC Member. Added extra sections and glued them together Project images are available to Club Members Only, Click to become an OMOC Member. Top result Project images are available to Club Members Only, Click to become an OMOC Member. 6 Quote Link to comment Share on other sites More sharing options...
CRAZYDAVE Posted May 2, 2017 Share Posted May 2, 2017 21 hours ago, Kevin Abbott said: We wanted more depth to the irmscher ascona b twin light setup as the originals left the lights stuck out too far. Project images are available to Club Members Only, Click to become an OMOC Member. So I got creative and looked around for a way to get more depth, playing with just a set of glass convinced me that's what I needed to do Project images are available to Club Members Only, Click to become an OMOC Member. That's a better depth, hmmmmm, how to achieve it.... Looking around the lab the air con tube looked the correct size so I tried a manta headlight in I had lying around. Project images are available to Club Members Only, Click to become an OMOC Member. I bought a length of tube and cut it up Project images are available to Club Members Only, Click to become an OMOC Member. Ascona b irmsher twin light bezels are easy to get so I chopped these up Project images are available to Club Members Only, Click to become an OMOC Member. Added extra sections and glued them together Project images are available to Club Members Only, Click to become an OMOC Member. Top result Project images are available to Club Members Only, Click to become an OMOC Member. I've never liked those lights for that very reason! I do now!! 2 Quote Link to comment Share on other sites More sharing options...
GerryC400 Posted May 2, 2017 Share Posted May 2, 2017 (edited) Brilliant Looking car. I think no bumpers with those arches looks proper! I would like to know which surrounds you used for the headlights. I am thinking of the same for my project way down the line, the square lights are so difficult to get now. Look forward to seeing more pics of it complete. Oops , went back over your post and see where you got the lights from ........just need to find some now. Edited May 2, 2017 by GerryC400 1 Quote Link to comment Share on other sites More sharing options...
Kevin Abbott Posted May 8, 2017 Author Share Posted May 8, 2017 (edited) More work completed by Andrew, Loz and I over the weekend.Stripped and built the doors with the green glass I have been storing for years The paint looks stunning but the hardest part was done by Tom the body man at Andrews who did my red coupe prep. Project images are available to Club Members Only, Click to become an OMOC Member. De locked looks great Project images are available to Club Members Only, Click to become an OMOC Member. Project images are available to Club Members Only, Click to become an OMOC Member. Sunroof wiring extended to move the switch Project images are available to Club Members Only, Click to become an OMOC Member. Loads more trim blasted and painted Project images are available to Club Members Only, Click to become an OMOC Member. Project images are available to Club Members Only, Click to become an OMOC Member. Engine bay being put back together Project images are available to Club Members Only, Click to become an OMOC Member. Project images are available to Club Members Only, Click to become an OMOC Member. Parts hunt into the loft scored gold Project images are available to Club Members Only, Click to become an OMOC Member. Project images are available to Club Members Only, Click to become an OMOC Member. Mirrors painted and fitted, door glass trim modified to suit Project images are available to Club Members Only, Click to become an OMOC Member. Project images are available to Club Members Only, Click to become an OMOC Member. bonnet needs mesh and gas struts Project images are available to Club Members Only, Click to become an OMOC Member. I pulled two headlinings out of the loft ready to fit. Turned out they were bloody non sunroof coupe ones! Durr, more hunting found two hatch ones, non sunroof and sunroof. the manta sunroof one won't fit as the calibra hole is in a different place. Headlining now is the most pressing part as the rest of the interior and glass fits all around it Drain tubes fitted Project images are available to Club Members Only, Click to become an OMOC Member. Edited May 8, 2017 by Kevin Abbott pics 7 Quote Link to comment Share on other sites More sharing options...
stradacab Posted May 8, 2017 Share Posted May 8, 2017 Lenk tuning or East Kent will be able to knock a headliner up for you 1 Quote Link to comment Share on other sites More sharing options...
Kevin Abbott Posted July 21, 2017 Author Share Posted July 21, 2017 Oh well. It looks like photobucket have ruined the build thread. Its finished now and looks awesome. Quote Link to comment Share on other sites More sharing options...
TheRealExile Posted July 21, 2017 Share Posted July 21, 2017 8 hours ago, Kevin Abbott said: Oh well. It looks like photobucket have ruined the build thread. Its finished now and looks awesome. Have you tried imageshack? I think it's free up to 10Gb bandwidth, there is also Tinypic but they are owned by photobucket and if the pic isn't clicked on for 90 days they delete it. Quote Link to comment Share on other sites More sharing options...
rutts Posted July 21, 2017 Share Posted July 21, 2017 9 hours ago, Kevin Abbott said: Oh well. It looks like photobucket have ruined the build thread. Its finished now and looks awesome. Photo bucket is shit they stole my pics need to pay to get them back. Quote Link to comment Share on other sites More sharing options...

Recommended Posts
Join the conversation
You can post now and register later. If you have an account, sign in now to post with your account.